Quickstart
This guide will walk you through connecting Figma to your AI coding agent. We'll cover how to get the MCP running and integrated with your IDE. You'll also learn how to make your first request to the MCP.
1. Grab your Figma access token
Before you can pull design data from Figma, you will need to generate a Figma access token.
- From the home page in Figma, click your profile icon in the top left corner and select
Settingsfrom the dropdown. - In the settings menu, select the
Securitytab. - Scroll down to the
Personal access tokenssection and clickGenerate new token. - Enter a name for the token and make sure you have read permissions on File content and Dev resources, then click
Generate token.
If you need more detailed instructions, you can find them in Figma's documentation on access tokens.
2. Connect Figma to your IDE
Find your editor or agent below and follow the setup instructions. Once you update the MCP configuration, the Framelink MCP server will be automatically downloaded and started.
The configurations below use npx to run the MCP server. If you're on Windows or prefer a different runtime, see items below.
Global Configuration
MCP Clients
If your editor isn't listed above, check its documentation for MCP server configuration. Most editors that support MCP accept a similar JSON format. You can also join our Discord if you need help getting set up.
3. Implement your first design
After configuring your IDE, you'll be able to pull complete design data from any Figma file.
Copy a link to a Figma frame or group
The MCP server compresses the data it receives from the Figma API by almost 90%. Even still, complex designs can overwhelm AI agents with too much information.
You can try to get your editor to implement a whole design for you, but for the most consistent results, work on one section at a time.
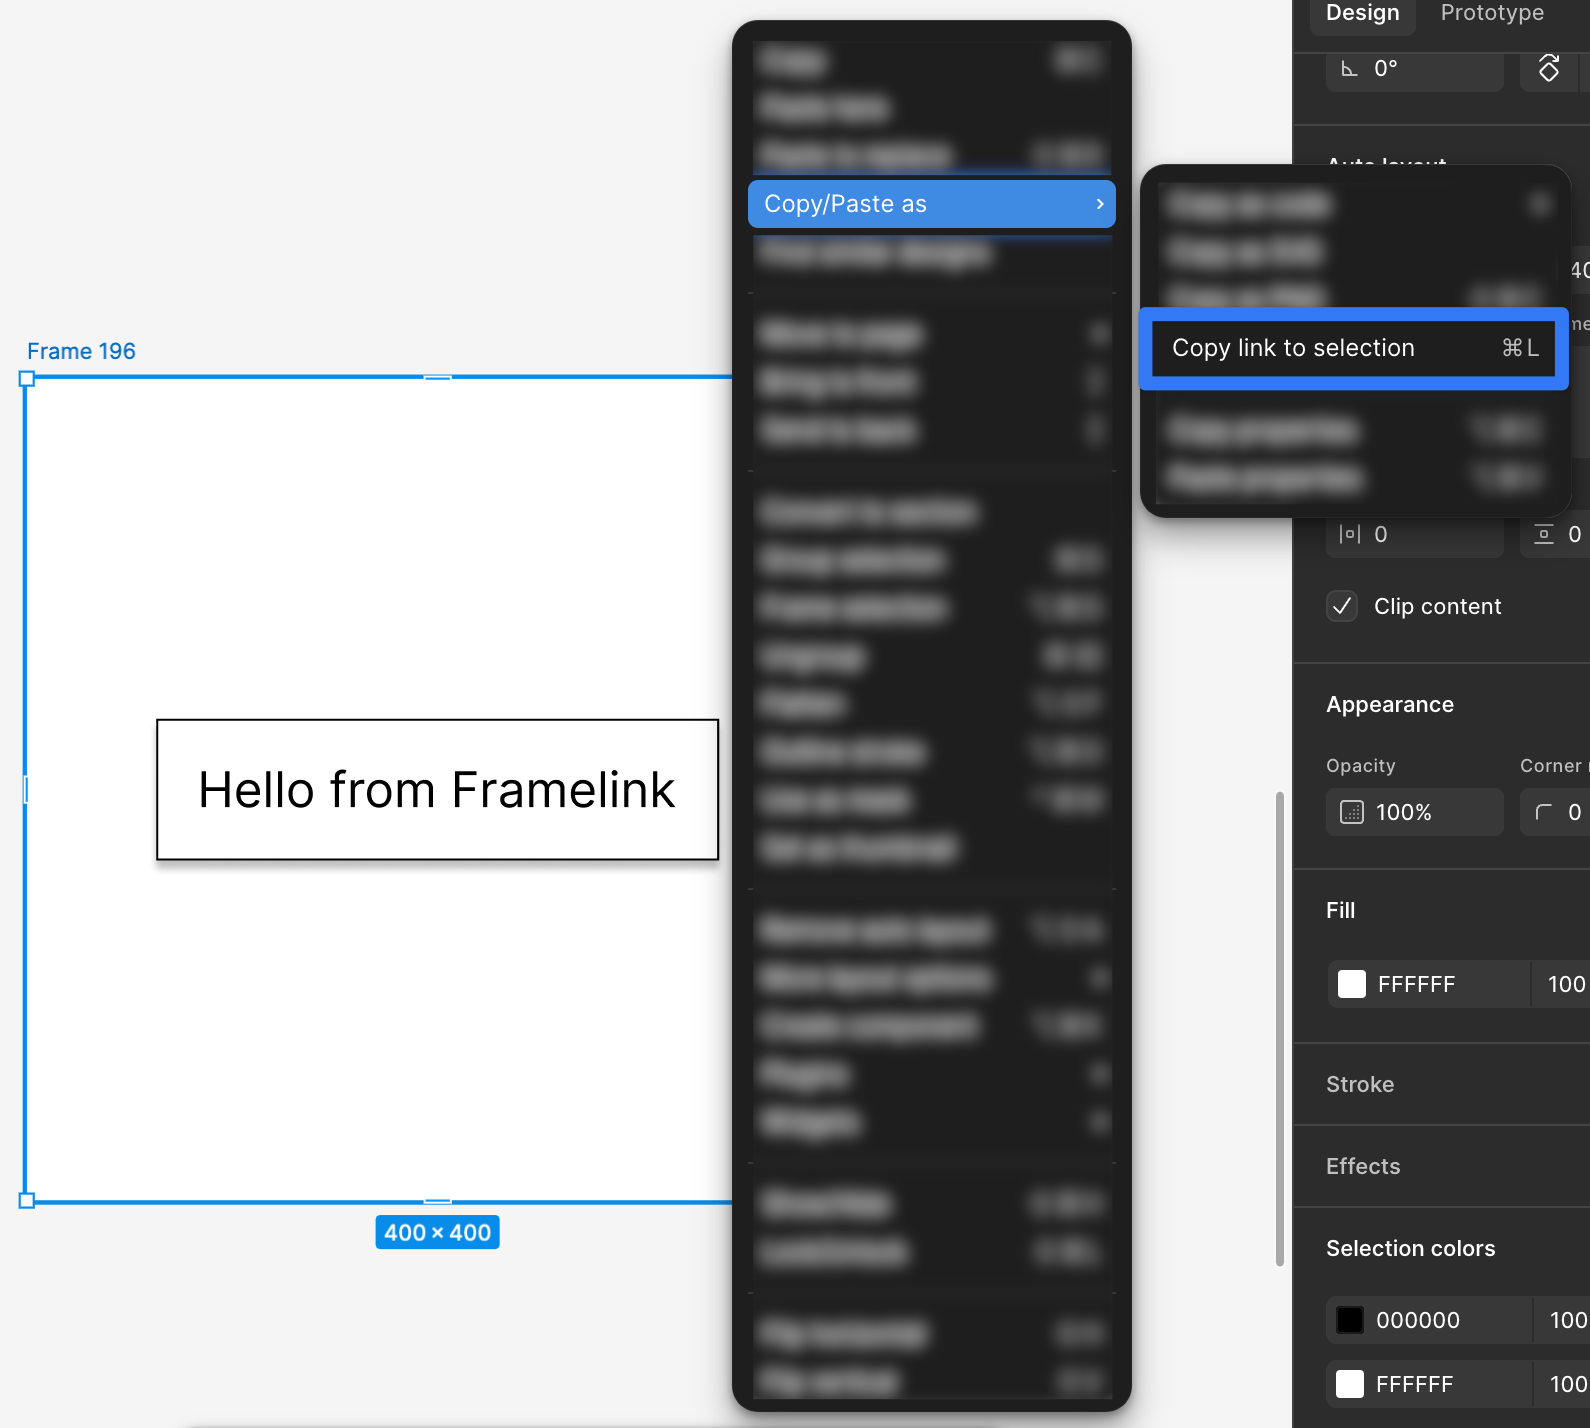
To do that, right click on the frame or group you'd like to implement, then select Copy/Paste as and choose Copy link to selection.
Paste the link into your editor
Once you have a link to the Figma frame or group, you can make a request to your editor's AI agent.
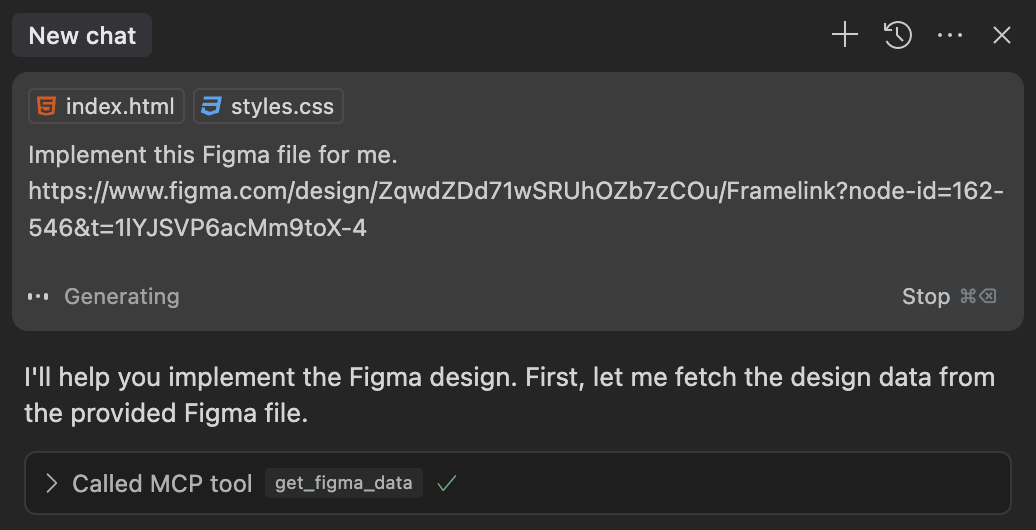
A request as simple as "Implement this Figma frame" along with the link should be enough to get the agent to call the MCP's get_figma_data function, but more context is often helpful in getting the best results.
Get your design
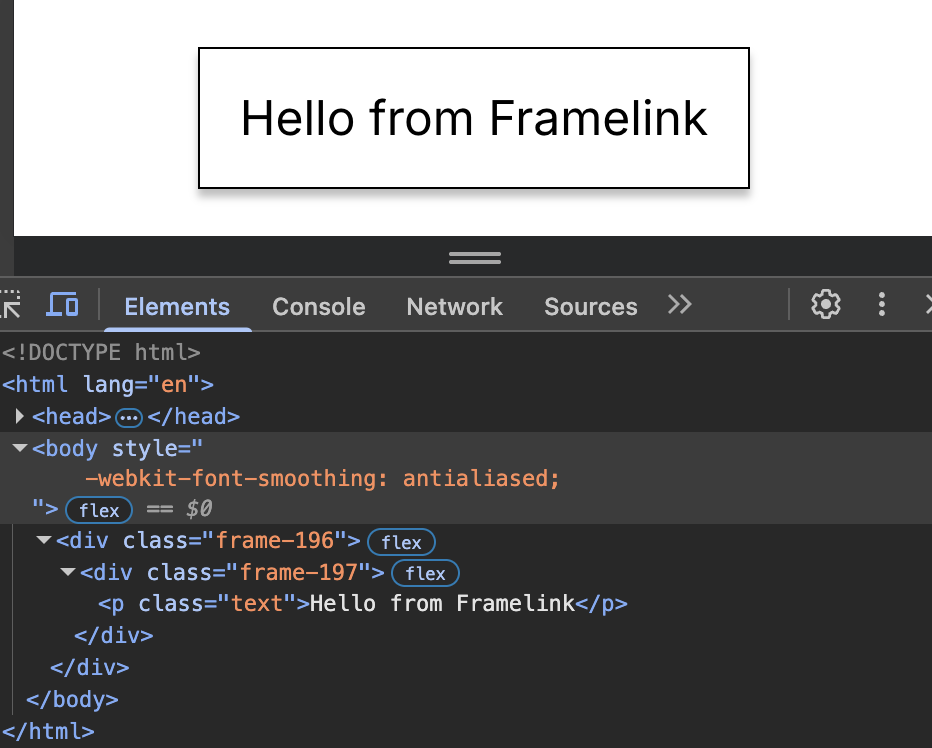
After submitting your request, your coding agent will get to work. It should call the MCP's get_figma_data function with the link you provided. Using the information returned from this function, your agent will generate a design.

As you can see above, the agent decided to name the classes frame-### since the Figma frames used in this example used Figma's default naming. Since this was a very simple design without much context about the intended use of the element, the agent just went with a literal interpretation of the frame's contents.
The design, however, is complete and functional.
Troubleshooting
There are some common issues you might run into when connecting to Figma. See the troubleshooting guide for more information.
Next steps
This MCP is simple but powerful in the right hands.
If you're ready to take your prompting skills to the next level, check out the best practices guide to learn how to use the MCP to its full potential.